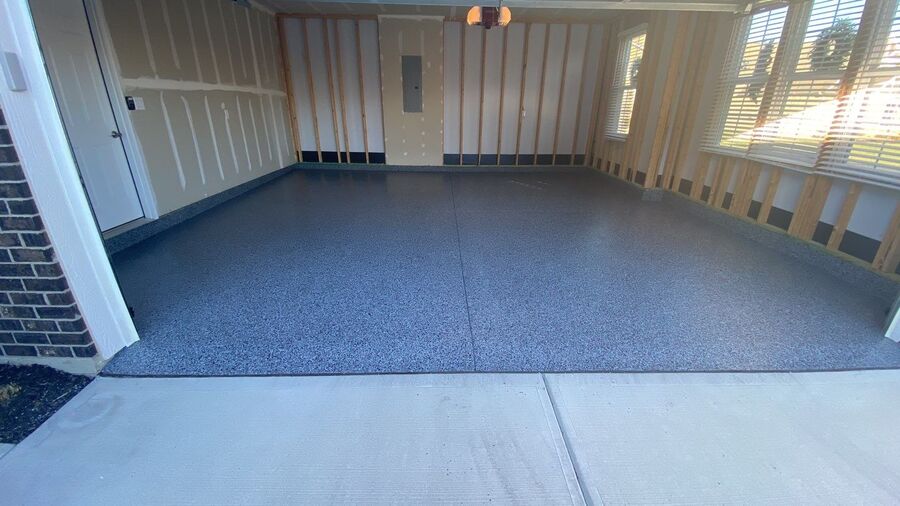
The Art of Resurfacing a Garage Floor
for a Fresh New Look

Garages often serve as multifunctional spaces, not just for parking vehicles but also as workshops, storage areas, or even an extension of the living space. However, over time, garage floors can become worn, cracked, or stained, detracting from the overall aesthetics and functionality of the space.
Resurfacing the garage floor is an excellent way to breathe new life into this essential part of your home. In this article, we will explore the art of resurfacing a garage floor, discussing the benefits, materials needed, and the step-by-step process to achieve a fresh new look.
Benefits of Resurfacing a Garage Floor
Enhances Aesthetics: A resurfaced garage floor can completely transform the look and feel of the space. With various options available, such as decorative coatings, epoxy finishes, or polished concrete, you can create a visually appealing surface that complements your personal style and enhances the overall appearance of your garage.
Improves Durability: Garage floors endure significant wear and tear, from vehicle traffic to heavy tools and equipment. Resurfacing the floor with durable materials, such as epoxy coatings or concrete overlays, can greatly improve its strength and longevity. This ensures that your garage floor can withstand daily use and will continue to look great for years.
Enhances Safety:Cracks, pits, and uneven surfaces on a garage floor can be hazardous, posing a tripping or slipping risk. By resurfacing the floor, you can eliminate these imperfections and create a smooth, level surface, reducing the chances of accidents and injuries.
Simplifies Maintenance:A resurfaced garage floor is much easier to clean and maintain compared to a worn-out, porous surface. Whether it’s oil spills, dirt, or other stains, a properly sealed and finished floor can be effortlessly cleaned with a quick sweep or mop, making it a more hygienic and inviting space.
Materials Needed for Resurfacing
Concrete Repair Kit: This includes a concrete patching compound, crack filler, and bonding agent to repair any cracks or imperfections on the existing garage floor.
Cleaning Supplies: A stiff brush, degreaser, and pressure washer will be required to thoroughly clean the garage floor, removing any dirt, oil, or other contaminants.
Resurfacing Material: Depending on your preference and budget, options such as epoxy coatings, concrete overlays, or decorative finishes are available. Choose the one that suits your needs and desired aesthetics.
Application Tools: Common tools for resurfacing a garage floor include a trowel, roller, squeegee, and paintbrushes. These will help you apply the resurfacing material smoothly and evenly.
Step-by-Step Process
Preparation
Clear the Garage: Remove all items from the garage to create a clear workspace.
Patch and Repair: Inspect the floor for cracks or potholes. Use a concrete repair kit to fill in any damaged areas. Follow the manufacturer’s instructions for the best results.
Clean the Floor: Sweep the entire floor to remove loose debris. Apply a degreaser to any oil or grease stains and scrub the surface with a stiff brush. Rinse the floor thoroughly using a pressure washer and allow it to dry completely.
Priming
Apply the Bonding Agent:Use a paint brush or roller to apply a bonding agent to the entire floor. This will help the resurfacing material adhere properly to the existing surface. Follow the manufacturer’s instructions for drying time.
Resurfacing
Mix the Resurfacing Material: Prepare the resurfacing material as per the manufacturer’s instructions. Ensure it is mixed thoroughly to achieve a consistent texture.
Apply the Resurfacing Material: Begin applying the resurfacing material using a trowel or squeegee, starting from one corner and working your way toward the exit. Spread it evenly, maintaining a consistent thickness throughout the floor.
Smooth and Level: Use a trowel or roller to smooth out the resurfacing material, ensuring a level surface. Pay attention to any ridges or uneven areas, smoothing them out as you go.
Decorative Finishes (Optional): If you opt for a decorative finish, such as an epoxy coating or decorative chips, follow the manufacturer’s instructions to apply these additional layers. This can add a unique and personalized touch to your garage floor.
Curing and Drying
Allow Sufficient Curing Time: After the resurfacing is complete, follow the manufacturer’s instructions for the recommended curing time. This usually involves keeping foot traffic and vehicles off the floor for a specified period.
Ensure Proper Ventilation: Proper ventilation is essential during the curing process to allow any fumes or odors to dissipate.
Resurfacing a garage floor is a rewarding project that can revitalize the space and provide numerous benefits. By enhancing the aesthetics, improving durability, enhancing safety, and simplifying maintenance, resurfacing allows you to create a garage floor that not only looks fantastic but also functions optimally for your needs.
With the right materials and a step-by-step approach, you can master the art of resurfacing and transform your garage into a fresh, inviting area that complements your lifestyle. So, roll up your sleeves and give your garage floor the attention it deserves for a fresh new look!
Key Takeaways:
- Resurfacing a garage floor can completely transform its look and enhance the overall aesthetics of the space.
- It improves durability and ensures that the floor can withstand daily wear and tear, prolonging its lifespan.
- A resurfaced garage floor eliminates hazards such as cracks and uneven surfaces, making it safer for occupants.
- The materials needed for resurfacing include a concrete repair kit, cleaning supplies, resurfacing material, and application tools.
- The step-by-step process involves preparing the floor, priming it, applying the resurfacing material, and allowing for proper curing and drying.
- Decorative finishes, such as epoxy coatings or decorative chips, can add a personalized touch to the garage floor.
- Adequate ventilation and following the manufacturer’s instructions are crucial for achieving the best results.
- Resurfacing a garage floor is a rewarding DIY project that can significantly improve the functionality and appearance of the space.
