
13 Simple Tips For Remodeling
Your Concrete With Epoxy
Have you considered remodeling your concrete flooring using epoxy,
but you’re unsure where to start? Don’t fret because we have 13 simple
tips to make this the easiest remodel you’ve ever done. In this article, you will learn all about the steps that you need to take in order to complete your floor remodel perfectly! We have created a useful list of concrete flooring ideas. From choosing the right colors to cleaning & maintenance we have you covered. Keep reading to discover the tips of the trade!

1. Use the Perfect
Color Combinations.
One of the main aspects of making a room look it’s best is by utilizing
complementary colors. Without using complementary colors you
could end up with a room that clashes.
Using one of the three main complementary color combinations is a
surefire way to create a beautiful place with your new epoxy flooring.
The Three Main Complementary Color Pairings Are:

Red & Green

Blue & Orange

Purple & Yellow
You may be wondering what complementary colors even are. The purest
way to explain complementary colors is that they are colors opposite one
another on the color wheel. A pair of complementary colors is made up of
one cool color and one warm color. Orange, reds, and yellows are the
warm colors, while blues, greens, and purples are the cool colors. This
creates what is recognized as simultaneous contrast.
Simultaneous contrast occurs due to a natural illusion when you fix two
complementary colors next to one another. Both colors will appear more
vivid and seize an onlooker’s attention. A lot of the current popular
schemes in homes today revolve around complementary colors.
Some Of The Most Popular Currently Are:

Peach And
Peacock

Bubblegum
And Sage

Mauve And
Gold

Cherry And
Emerald
2. Spice Up Your Space With Textures!
The next step in creating the perfect space with your concrete flooring remodel is using textures and patterns.. Give your
floor a facelift with patterns and textures! A great way to achieve this is by using decorative flake epoxy flooring. Decorative
flake epoxy floors can be made with a variety of textures, patterns, and color combinations.

There Are Two Main Reasons To Use a Textured Floor:

Aesthetics

Slip Resistance
A textured floor using decorative flake epoxy creates a high-contrast pattern that immediately catches the eye of anyone entering the room. The
texture creates depth because light reflects differently on the surface of the floor. The use of the chips in the epoxy allows contrast in the
color scheme to create a beautiful mosaic on your floor. The other key benefit of textures is creating a slip-resistant floor. The texture
allows for better traction in rooms where spills are more likely.
Along with your textures, you can have inspiration in the pattern of your texture too! Depending on the size of the flakes you incorporate on your
floor will create the pattern. Smaller flakes give a sand-like appearance on your floor, while larger flakes can create a stone terrazzo look.
3. Throw a Pattern Into the Mix!
Make your remodeled floor interesting by incorporating a pattern. Love the possibilities of tile flooring?

Epoxy floor coatings of contrasting colors can be placed in geometric patterns compared to tile floors. Beyond geometric patterns, epoxy floor coatings can also be installed in accordance with more pure, natural designs for a freer, more flowing aesthetic by using metallic epoxy flooring.

Make your pattern two-toned to employ those complementary color schemes! Once you’ve determined the color profile that works for your space, keep that progressing with your epoxy floor. The contrast will produce an engaging, vibrant look in whatever pattern you go with from geometric shapes to flowing, natural scenes.

Get creative with your concrete flooring to
make a unique, one-of-a-kind design! If you love the
shapes and patterns of tile, expand on that
idea and use your imagination. The possibilities
are only as limited as your ideas with epoxy.

You can create whatever shapes and profiles
you can think of. The same goes for metallic
epoxy floors, as they have the ability to mimic
a myriad of different scenes from nature.
4. Start Your Project on
Bare Concrete.
Now that your remodel has a vision in mind, it’s time to start the
installation process for your concrete flooring. The first thing to
do is to remove your existing flooring system.
Here are some tips for safely removing whatever flooring system you currently have installed:

Create Your Starting Point.
Create your starting point find a bare edge, or make
one, in the room to start the removal.

Remove Fixtures.
Remove fixtures that may get in the way- Make sure to
turn off the water supply and remove toilets or sinks
that may be in the room for remodeling. If the room
doesn’t have these, remove any other fixtures
inhibiting the removal.

For Carpet.
From your starting point, detach the carpet from the
tack strip that holds the carpet in place along walls,
just grab the carpet with pliers and pull. Then grab the
carpet by hand and continue to pull it up along an
entire wall. Fold back about 3 ft. of carpet and cut it
into easy-to-handle strips. Carpet is much easier to cut
from the back than from the front. Use a sharp new
blade in your utility knife and be careful not to slice
into baseboard or walls.

Clean.
You will need to sweep off all debris from the removal
and clean residue from the concrete surface to ensure
the adhesion of the epoxy.

For Tile.
From your starting point, you will need to hammer, chisel,
and pry. This can be quite time-consuming. You will need
to dispose of old tiles into a trashcan
as soon as you begin removing them, so they
don’t pile up.

For Painted Concrete.
This is a larger project to undertake than the previously
mentioned removals. It may be best to hire a contractor
for this type of project.
The paint will need to be ground off using a grinder
designed for concrete flooring. These can be rented if you,
like most, don’t own one. Begin at your starting point and
grind the surface down until you’ve exposed the unpainted
concrete. This can typically be done in a single day.
The materials you will need for removing your existing flooring will depend on what type of floor you have. For tile, you will need a hammer,
chisel, and flat bar. For carpet, you will need pliers and a utility knife. For painted concrete, you will need a floor grinder. All of
these methods will require a trashcan for debris.
After the removal is finished, you may discover your concrete flooring
is cracked. If this is the case, it will need to be repaired. Repairs can be
made easily using epoxy injections for crack repair.
Epoxy injection is a cost-effective means of repairing cracks in concrete and is capable of returning the concrete to its pre-cracked
strength. This is done by adhering ports along the length of the crack with epoxy, then you will inject epoxy into
each of these ports to fill the crack in its entirety.
5. Prep Your
Flooring Properly.
Getting your floor cleaned and prepped is just as
vital a step as removing the old floor.
Here are a few tips to get you going:
- Sweep all large pieces of debris from the concrete.
- Vacuum the surface of the concrete to remove any fine dirt particles.
- Ring out your mop regularly to ensure the concrete doesn’t
become oversaturated. - Once finished, rinse out your mop and get a bucket of clean water.
- Mop the floor again to remove any residue from the cleaning solution.
- Combine two ounces of detergent with warm water and mop the entire
surface of the concrete. - Sprinkle powder detergent on any stains and pour enough boiling
water over the detergent to cover the stain. Then scrub with a stiff
brush to remove the stain. - If you had carpet or tile, you may need to use a handheld scraper to remove
any leftover adhesive. Then sweep once more.

Materials that you’ll need to get the concrete flooring prepped are as follows:

Handheld Scraper
Pushbroom

Angle Broom

Vacuum

Mop & Bucket

Power Detergent

After you’ve got your concrete foundation looking clean, you’ll need to remove any fixtures that could hinder installation that you didn’t remove in the previous steps. Be sure to turn off the water supply to any fixtures actively hooked up to running water.
Once again, check for any damage on the concrete, like sprawling cracks. Be sure to repair these by injecting epoxy, as previously mentioned, before continuing.
Now you need to remember your starting point we discussed from removing your existing floor. If your concrete didn’t have flooring on
it to begin, you’ll need to find a starting point along a bare edge or corner for the resurfacing of your concrete.
Utilize all your tools properly when prepping your concrete flooring. It’s easy to get started and, before you know it, you’ve damaged your floor. Misuse of tools and equipment can drive up the cost of a remodel exponentially. If you’re unsure of a portion of the remodel, seek out the help of someone experienced or hire a professional.
Now you need to look into underlayments to make sure your
floor is level. The primary purpose of underlayments is to apply
a thin topping to level a concrete substrate before installing
the epoxy flooring.
Here’s how to apply it, once you’ve got the
surface of the concrete ground:
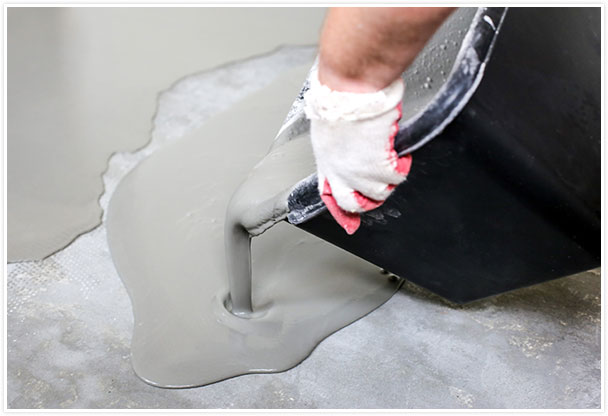
- You’ll need to mix the underlayment material with water.
- Once you have the underlayment mixed, begin to spread the
mix on the concrete using a trowel. - Smooth out the surface of the underlayment, most brands
are self-leveling. - Allow it to air dry.

6. Time to Resurface, So Let’s Get Grinding!
To properly prepare the concrete for epoxy flooring, its best to grind the surface of the concrete thoroughly and apply a resurfacing agent to ensure the epoxy coating adheres.
Now you need to get your hands on a floor grinder if you haven’t already. You can either rent or buy one of these pieces of equipment. There are a few places you can rent a concrete floor grinder, like here.
To save yourself time, money, and effort, it may be in your best interest to hire a contractor to get the job done. Hiring a contractor will ensure that the project is completed professionally and of high quality.

If you’ve elected to do this task yourself, it’s time to get grinding! You’ll need to be prepared for the dust that follows, so be sure to have dust masks on hand.
You only need to rough up the surface thoroughly, no need to grind waves into your floor.
Grind the entire surface of the concrete, including edges and corners. Any spots left will not allow the resurfacing agent to adhere properly.
Once you’re done, you’ll need to clean up all the dust and debris once more. Sweep the entire surface of the concrete and vacuum up all the fine particles.
Now it’s time to apply the resurfacing agent. Concrete resurfacer is a special product that blends ordinary Portland cement, fine
sands, polymer modifiers, and other additives aimed at providing adhesion.
Here The Steps To Apply It:
- Mix the resurfacing agent with water.
- Pour the resurfacer in narrow strips, allowing it to self-level along the way.
- After no more than 15 minutes, pour the next batch adjacent to the first.
- Do not walk on the resurfaced floor until it has set. A normal mix requires
one to two days, fast set mixes only need two to four hours. - Wait for one to two weeks to install the epoxy flooring for normal set
mixes and 24 to 48 hours for fast set mixes.

7. Use Best Materials
for Best Results!
For the best results, only use the highest-quality
materials. Following are some tips on where to
find the best materials for your concrete
flooring remodel:
- C1. Colored Epoxies 10017 Dark Blue Epoxy Resin, 100% solids, 3-Gallon Kit.
- Epoxy-Coat Full Kit, Taupe with Beige Blend Flakes.
- Aerocoat High Build Epoxy Floor Coating System for 2.5-Car Garage.
- Rust-Oleum 261845 EpoxyShield Garage Floor Coating, 2 gallons, Gray.
- Supercoat DecoEffects Arabian Night Epoxy Floor Coating.
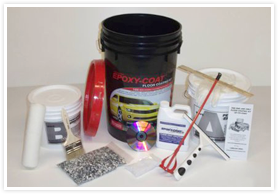
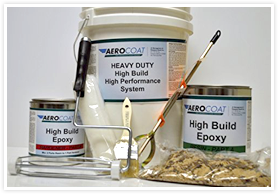
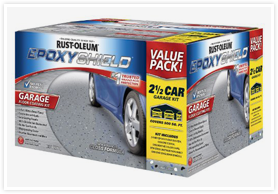
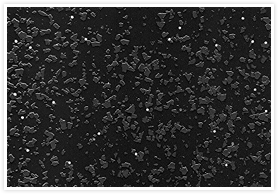
While generic kits are the cheapest way to cover concrete floors…Try to avoid generic kits that you find at major retailers like Home Depot and Lowe’s. Use high-quality kits from trusted
sellers that are focused on epoxy flooring. These will give you the best results for your remodel.
Try to find authentic 100% epoxy coatings like the examples listed above. 100% solids epoxy is more abrasion resistant, chemical resistant, and stain resistant than its water-based counterparts. They work well as a color coat and medium to accept vinyl acrylic flakes and can last upwards of 20 years or more.
Get the tools you need for this project. Don’t skimp on the tools because you’ll wind up with a sub-par floor. if you don’t use the correct tools it’s easy to damage your floor or mess up the resurfacing process and be forced to start over. This will result in driving up costs substantially. Continue reading to discover another 6 ways to make concrete floors look amazing!
8. Go Local & Find Yourself
a Killer Contractor!
Finding these high-quality materials and costly equipment can be difficult. If you hire a professional it can relieve the headache of doing all this alone. In cases where you don’t already have all the tools needed for the job, you can save money by hiring a professional to remodel your concrete flooring.
Your local contractor is only one call away. Do a search for epoxy flooring contractors near me and you’ll turn up a plethora of results. Check the reviews and find one that suits your needs and give them a call!

When you find your contractor, ask about a free quote. Most contractors are more than happy to give you a free quote for remodeling your concrete flooring.
If you use a contractor, your results will be better than expected! Your local contractor will do the best, professional job available. No more headaches and no more worrying about how your work will turn out. Your contractor will handle everything for you.

Another benefit of hiring a contractor to do the work for you is a warranty. Check with your contractors before making a decision and see if they offer a warranty.
With a warranty, any issues that come up with your flooring can be fixed by your contractor at no extra cost for the time period they offer. Otherwise, if you do it yourself, any problems
that arise are on your shoulders alone.
9. Pennies, Dimes & Nickels:
Pricing & Your Budget.
For the materials used in epoxy flooring, epoxy flooring costs fluctuate from $750 to $4,928 with most people spending between $1,320 to $3,080 for both materials and installation. 100% epoxy is the best choice for long-lasting flooring with less maintenance.
As far as hiring a contractor goes, epoxy flooring costs $3 to $7 per square foot installed depending on the type of epoxy selected. For epoxy installation, materials cost $1 to $2 per square foot, and labor costs $2 to $5 per square foot typically.
Your final will be heavily dependant on the size of the space you need to be epoxied.

For garage epoxy floors, a typical 24’ x 24’ 2-car garage will cost an average of $1,728 for professional epoxy coating installation.
Epoxy concrete sealer is one of the most reliable sealers you can add to your garage floor because of its great resistance to damage and high traffic.
For metallic epoxy floors, many certified metallic epoxy flooring installers charge $7-$15 per square foot.
For stamped concrete, basic stamped concrete costs between $8 and $12 per square foot, but more involved projects can be as expensive as $18 per square foot.
Comparing the cost of DIY projects versus hiring a contractor requires factoring in more than just the initial install. With contractors, you have a warranty to rely on as well, typically. On average, a DIY project costs around $2,600 to do, counting maintenance and work required after installation. With a contractor, the cost, on average, is about $2,300.
10. Know Your Finishes!
There is a myriad of types of epoxy flooring options out there. Here are some.
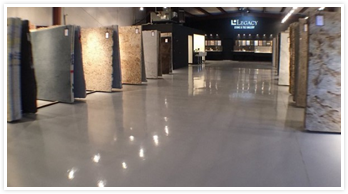
Epoxy Flooring
The most straightforward definition of epoxy flooring suggests a flooring surface that comprises multiple layers of epoxy that is applied to a floor. Confusion typically occurs when comparing an epoxy floor and epoxy floor coating. The difference between the two lies in the depth of the epoxy. Epoxy floors are classified as an epoxy coating of at least two millimeters thick. Any epoxy floor less than two millimeters thick is generally referred to as an epoxy floor coating.
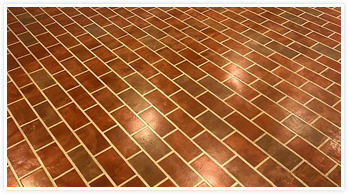
Stamped Concrete
Concrete that is patterned or textured to mirror brick, slate, stone, tile, wood, and various other patterns and textures. Stamped concrete is commonly used for patios, driveways, pool decks, and interior flooring.
The ability of stamped concrete to mimic other building elements makes stamped concrete an affordable alternative to using other genuine materials such as stone, slate or brick.
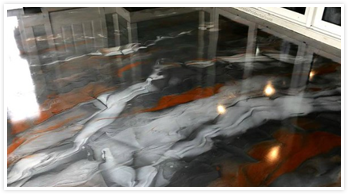
Metallic Epoxy
Forms a distinct, multi-layered epoxy floor coating that incorporates the application of a metallic additive mixed into a clear epoxy coating to create fascinating effects.
This metallic powder continues to run through the epoxy as it cures producing the unique design.
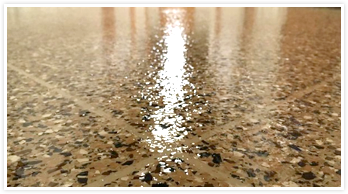
Flake Epoxy
The most straightforward definition of epoxy flooring suggests a flooring surface that comprises multiple layers of epoxy that is applied to a floor. Confusion typically occurs when comparing an epoxy floor and epoxy floor coating. The difference between the two lies in the depth of the epoxy. Epoxy floors are classified as an epoxy coating of at least two millimeters thick. Any epoxy floor less than two millimeters thick is generally referred to as an epoxy floor coating.
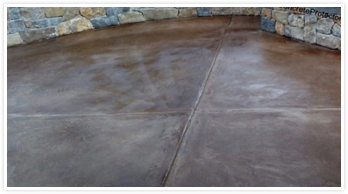
Stained Concrete
Concrete that is patterned or textured to mirror brick, slate, stone, tile, wood, and various other patterns and textures. Stamped concrete is commonly used for patios, driveways, pool decks, and interior flooring.
The ability of stamped concrete to mimic other building elements makes stamped concrete an affordable alternative to using other genuine materials such as stone, slate or brick.
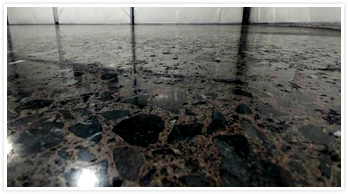
Sealed Concrete
Forms a distinct, multi-layered epoxy floor coating that incorporates the application of a metallic additive mixed into a clear epoxy coating to create fascinating effects.
This metallic powder continues to run through the epoxy as it cures producing the unique design.
11. Installation & What
to Expect.
As you’ve seen throughout this list, a lot goes into remodeling concrete flooring. The process takes time and is a tedious project to undertake.
You may be wondering how long this process will take. It usually takes one to two days for professional epoxy flooring installation. The contractor will begin by making necessary repairs, lifting stains, and diamond grinding your concrete. This is the element that takes the longest. Once the surface is prepped, your epoxy flooring will be installed.
As for how long it takes to cure, dry time for foot traffic is about 18 hours and heavy traffic is 24 hours at room temperature, regardless of thickness. Drying times are longer at cooler temperatures. Temperature and humidity can affect dry time. As with various high-performance floor coatings, a full chemical resistant cure is around three days.
12. Keep it Clean!
After you’ve gone through the process of remodeling
your concrete flooring and now have your new epoxy
floor, you need to keep it clean and maintained.
The better you maintain your flooring, the
longer it will last.
Here are a few tips on how to do just that:

Spot clean any spills. If you stay on top of any spills on your new floor, you won’t have to worry about stains that are difficult to remove.

For garage epoxy floors- Make sure to clean up any car-related chemicals that get on the floor. These can eat into the epoxy & cause damage over time.

Keep your floor dirt and grit-free. Dirt and grit will embed into the epoxy and scratch your floor’s surface.

Avoid using a soap-based cleaner because it will leave a film on your epoxy that builds up over time.
Clean your epoxy floors regularly to ensure they last as long as possible and look as good as they can. To do this, a great investment is a dust mop. A dust mop can help you clean your epoxy flooring quickly and safely.
Dust mops gently clean your floor system and gather up all dust and debris without scratching up the surface.
You should avoid cleaners with heavy chemicals in them. The heavy chemical in some cleaners can erode the surface of your epoxy flooring and destroy the sheen on it as well.
If you notice your floor has started to lose its mirror sheen, apply a wax coating. Waxing your epoxy floor occasionally will keep it looking brand new and make it last longer.
13. Complete the Look!
Now that you have your epoxy floor all finished up you should consider the furniture and decorations to add to your home. When choosing your furniture and decorations be sure to include them in the color scheme you picked previously.
Depending on the pattern and design you chose for your flooring, you should organize your furniture accordingly. Don’t cover up all the beautiful designs you created with furniture. Place the furniture and decorations in a manner that emphasizes your design plan.
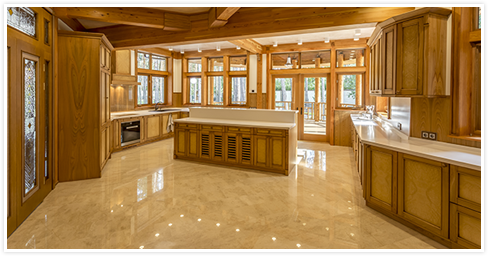
Keep in mind your flooring is an intricate part of your home design. Whatever colors and patterns you choose need to be reflected in the rest of the design of the room. From the walls to the furniture, your color scheme and profile need to match and complement one another.

Stick to a singular theme. If you try to implement multiple themes and designs you could wind up clashing or creating a room that is too busy. Pick a theme such as rustic, modern, or contemporary to make an integrating look that stuns anyone who enters the room.
Finishing Up!
So now you have all the info you need to get your concrete
flooring remodel underway. From everything on how to do
it yourself to hiring a contractor, you have all the info to
create the beautiful look you desire.
